FAQ
- The system of traffic counting is based on 95% algorithm
- How to start your work with video CDN
- How to start your work with pixCDN
The system of traffic counting is based on 95% algorithm.
Traffic and bandwidth readings are reported with 5 minutes intervals. In this way, there are ultimately 8640 readings as a result of this procedure (on condition that there are 30 days in the month). Select 5% of peak parameters that make 432 readings and exclude them from the list. You should determine the highest point from the rest 8208 readings. This is the value that affects the provider’s fee for the traffic. If, let us say, 5% of your readings make 10 Mb, 1 reading from the rest is 8 Mb and the rest readings make 3 Mb in general then you will have to pay for 8 Mb. We excluded 5% (or 10 Megabits) and selected the peak value from the rest. It is 8 Mb. As you see, this system of calculation is profitable to all who get steady traffic during the whole month. If you have surges of traffic (for instance, you bought traffic and 4 days a month people are directed to your website), then this method of traffic calculation will not be that beneficial and will experience an unpleasant surprise upon the bill receipt.
How to start your work with video CDN
What data needed to start using CDN.
login (to cdn)
domain (pointed to Redirectors)
path tag (directory on Streamings)
how to modify structure of files on CDN
speed (usually it is equal to size/time+10%)
buffer (part of file in bytes that should be passed to Surfer w/o speed limitation, usually it is equal to a few second of bitrate)
type of content protection(by referrers, URL signature, both)
referrers (allowed for hotlinking, if enabled protection by referrer)
rsync and http servers for download content to CDN
callback URL
file formats (3gp, mp4, wmv, etc)
average bandwidth
total amount of data
1. General vide CDN questions..
Our CDN serves only video files, for thumbs we usually use another type of CDN. CDN.
CDN for video works using 302 "Moved temporarily" redirect. Video files are stored on our servers. The amount of copies of each file depends on popularity of this file - more copies for more popular files, less copies for unpopular. First of all the request directed to the special server named Redirector. We have several Redirectors, and the domain hosted on CDN can be pointed on several IPs of Redirectors. When Redirector receives request it performs checkups of file's availability, permissions (referrer+URL key) and then returns 302 "Moved Temporarily" redirect to Streaming server which will serve this request and will put the file to the Surfer directly. Redirector chooses defined Streaming server depending on Streaming servers' load and their uplinks load, also depending on ping to the Surfer.
So, a separate domain needed for CDN, this domain should be pointed to addresses of Redirectors in DNS (address can be one, but we use several addresses for failsafe purposes and also for load distribution).
We have auxiliary scripts for automation of new files' addition. On the Customer's source storage server (where we get files from) two services should work: 1) HTTP-server for downloading of files; 2) rsync-server for getting of recursive directory listing..
At the beginning we import all files to CDN, the import is performed using web-form and POST-request to it. We send to the database a list with URL of file, its internal name in CDN, also some optional parameters like a size of file, a checksum, etc. Then CDN downloads files to our servers and after this files will be accessible via web (e.g. ready to use). After the successful import file can be removed from Customer's source storage server
We can save or modify the structure of directories, we store files on Streaming servers with original name but without directory, the directory is used only on redirectors.
We can't change once imported file on fly, need to delete file and reupload it, or upload it using another name. .
Here is an example or rsync config (rsync is used for automated addition of new files)
path = /home/client/videos.domain.com
comment = videos
list = false
hosts allow = 46.229.161.235 46.229.170.76 127.0.0.1
2. Download parameters of file.
We can use verification of referrer for hotlink protection or of URL key. URL key is used for protection for substitution of download parameters in URL. Both verifications are optional. The download settings can be specified in URL or can be omitted - in this case default settings will be used. Each domain can have default settings: referrers list (for antihotlink), default speed, buffer size, time to live of redirect to Streaming server. We can assign several domains with different default settings to one set of files. The document which describes download parameters of file is presented in the end of current document.
3. Callback URL.
There is an ability to specify callback URL, which will be executed each time when file successfully imported or not imported with some error. This URL used to let Customer's script know that file is ready to use.
Callback URL is optional, it returns status of import in parameters: '?status=(fail|success)&message=Some message'. e.g. for example with callback: http://www.domain.com/cdn_callback.php?file=/0772/10100.flv should be executed: http://www.domain.com/cdn_callback.php?file=/0772/10100.flv&status=success or http://www.domain.com/cdn_callback.php?file=/0772/10100.flv&status=fail&message=404%20error in case of error
How to start your work with pixCDN
1. Creation of the source..
If you want to switch your website to a CDN, you should go to the admin area(http://pixcp.ahcdn.com/)to the section Sources (http://pixcp.ahcdn.com/ru/sources) and press the button “Add source”.

One should enter the domain name in the field “Source”*. Our system will import images and other static files to our CDN (without hhtp:// in the beginning and / at the end – only domain name).
If you want to use your domain name for CDN delivery then you should point it in the field “CNAME” (you should create DNS-registration for it, pointing to the domain name from the field “access domain” as CNAME).
For activation of anti-hotlink you should specify at least one “REFERER:”. When the function of anti-hotlink is on, the files are distributed only if referrer is allowed, empty or blocked.

It can be used when the status of the source changes from “new” to “active”.
For instance, you pointed example.com as a source, CDN example.com as CNAME (and created, correspondingly, the CNAME note in the DNS). Then you can change the URL of images in the tag img in order to start showing images from CDN.
For file
2. Cash clearing and mass files deletion.
You should point to the source on the page “Sources” and press the button “Clear cache”.
There is a special function (“Mass files deletion”) for mass deletion of files in the menu. Select the source from drop-down list, then the type (files and directories, when “directories” is chosen then the names of files are also available in the list). The names of files in the list are divided with transfer to another line and paths you point should be relative. For instance, if you need to remove from cash http://cdn.example.comimages/1.png and http://cdn.example.comimages/2.png then point in the list:
img/2.png

3.Work with Storage.
PixCDN works on cash principle: during the first direction to the file it is imported to cash CDN and when other requests to the file are made – is distributed from the cash already.
One can import files to the cash CDN from your server and from specially dedicated storage PixCDN.
If it is convenient for you to store files for CDN in your storage, then one should create a domain in the storage, set it up and point it as a Source.
One should press the button “Add” on the page of “Storage”. The access of files in the storage can be received via FTP and with help of rsync.
The data of FTP access is shown in the field “info” on the page “Storage” in the list.
The data of access rsync are set in the mode of storage editing (pencil in the storage list). One should enter the data of your server as the connection is initiated on the part of storage. Authorization on SSH key (you can get it in the storage list on the link “show” on the opposite side of “ssh key”. The activation of files transfer on rsync protocol can be performed from the admin area or via API.
After the domain is set on storage and the files are placed there, you should enter the domain name that is pointed in the field “Storage” as a source (on the page “Sources” in the mode of sources editing).
6. CDN for Joomla!
1. Please, create the Source as it is shown here http://ahcdn.com/faq#pcdn1

2 Install the plagin by downloading from here http://download.nonumber.nl/?ext=cdnforjoomla
- For new version (2.2), use the following link http://download.nonumber.nl/?ext=cdnforjoomlaHYPERLINK "http://download.nonumber.nl/?ext=cdnforjoomla&v=2.1.2"&HYPERLINK "http://download.nonumber.nl/?ext=cdnforjoomla&v=2.1.2"v=2.1.2
- for PHP version 5.2 or earlier, please download the appropriate plugin version from http://download.nonumber.nl/changelog.php?ext=cdnforjoomlaHYPERLINK "http://download.nonumber.nl/changelog.php?ext=cdnforjoomla&full=1"&HYPERLINK "http://download.nonumber.nl/changelog.php?ext=cdnforjoomla&full=1"full=1
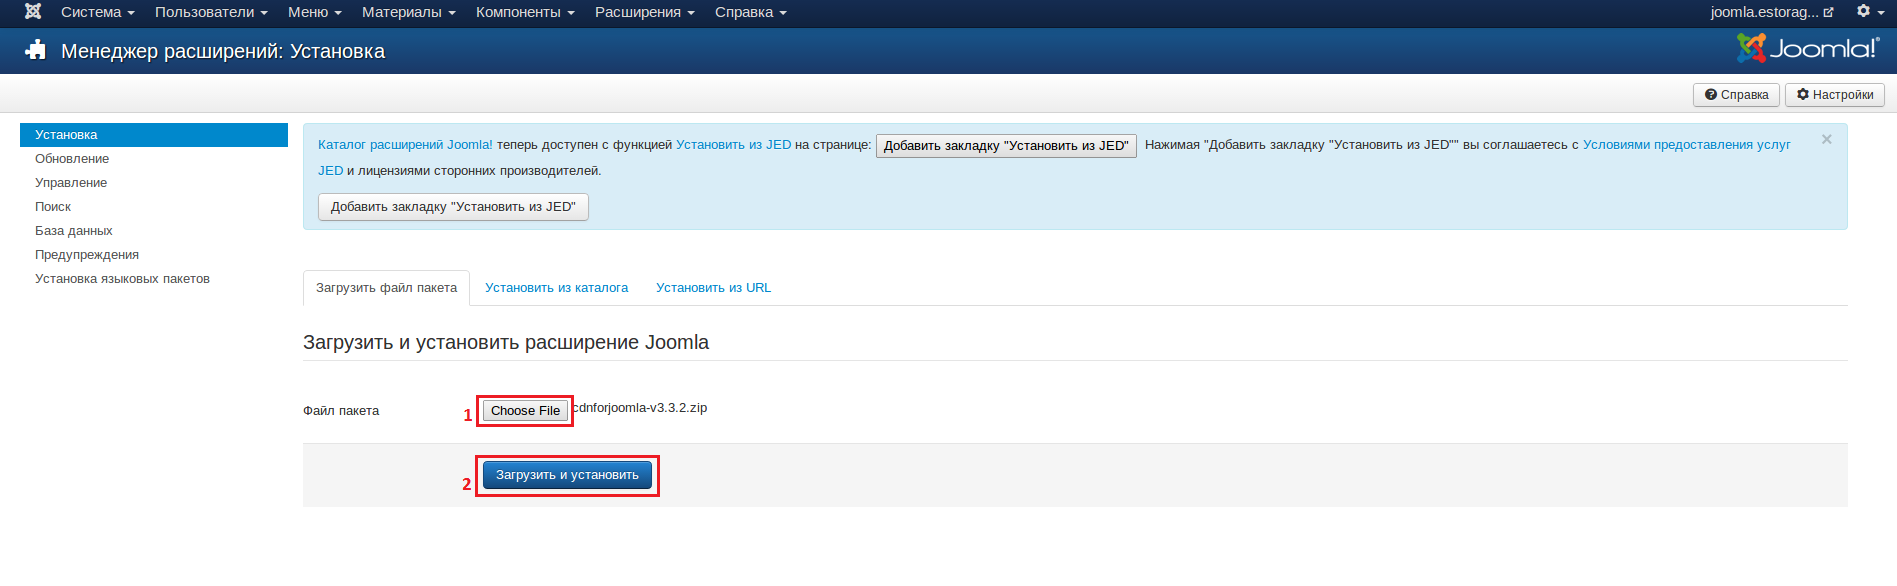
4. Select the plugin archive(1), and click Upload & Install(2)
5. When the installation is successfully complete, go back to Extensions, click Plugin Manager, and find System – CDN for Joomla!. Click on it to setup the plugin.

6. In the CDN Domain field(1), add your Fetch name from CDN control panel/CNAME then click Save & Close

7.CDN for Magento.
1. Please, create Source as it is shown here http://ahcdn.com/faq#pcdn1
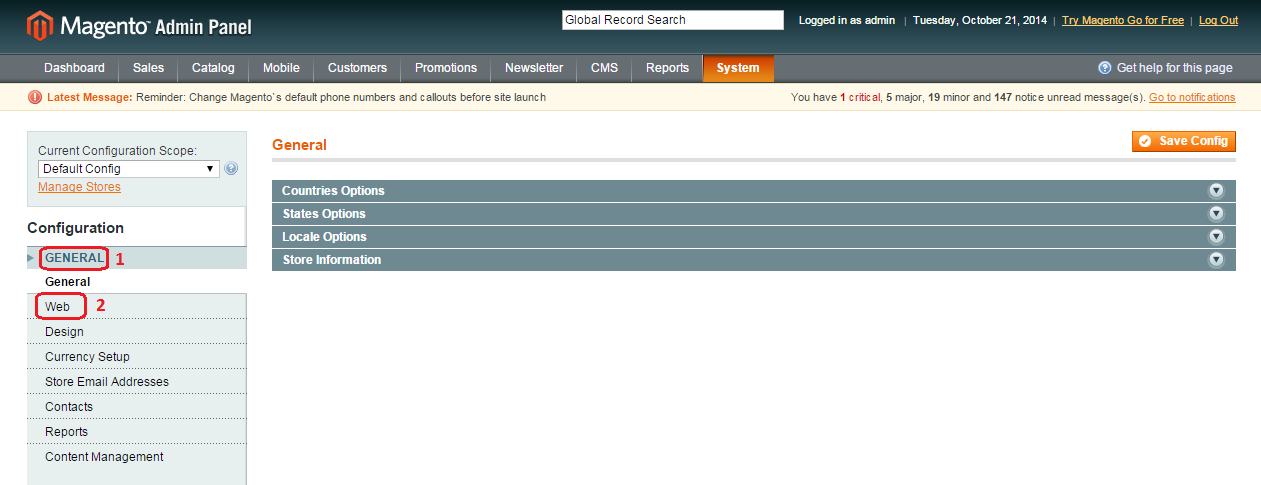
2. Login to Magento. Go to "System" (1) choose"Configurations" (2)

3. Here find "General" (1) click on "Web" (2)
4. Choose "Unsecure" tab(1) and enter the following info
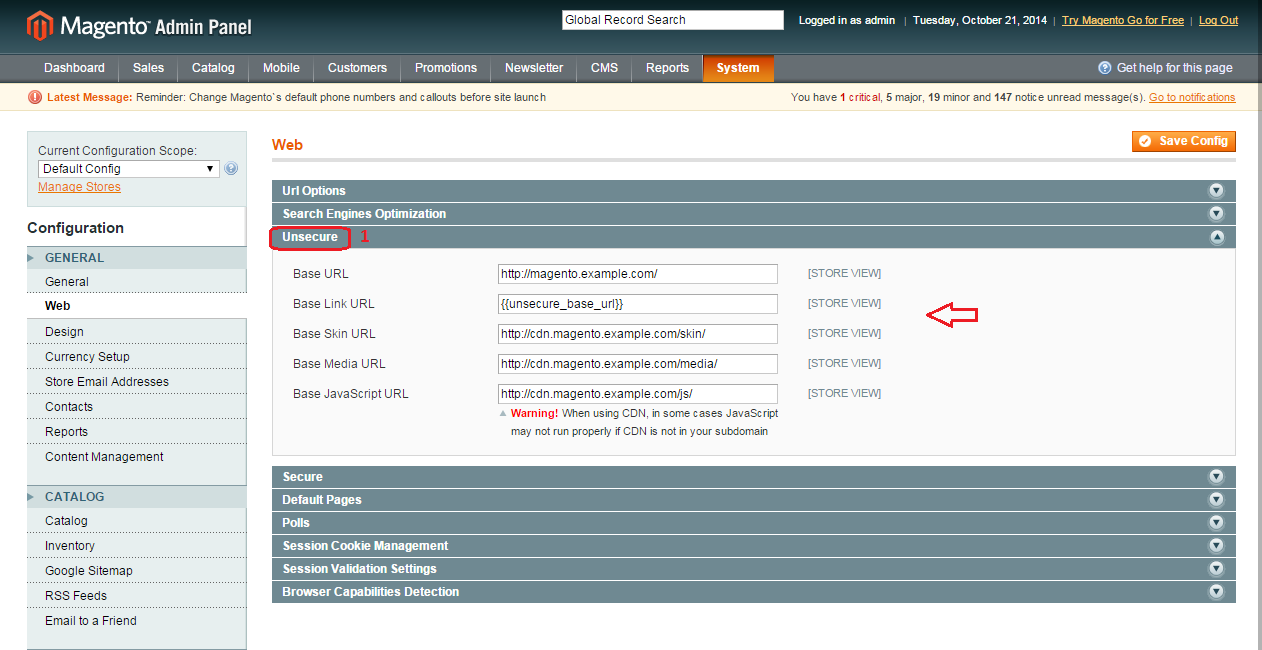
Base URL: enter your base domain http://www.domain.com
Base link URL: no need to change. Should be already be “{{unsecure_base_url}}”
Base Skin URL: enter url where skin located http://example.com/skin//
Base Media URL: enter url for media http://example.com/media/
Base JavaScript URL: enter url for javascript location http://cexample.com/js/
8. CDN for Drupal.
1. Please create Source as it is shown here http://ahcdn.com/faq#pcdn1
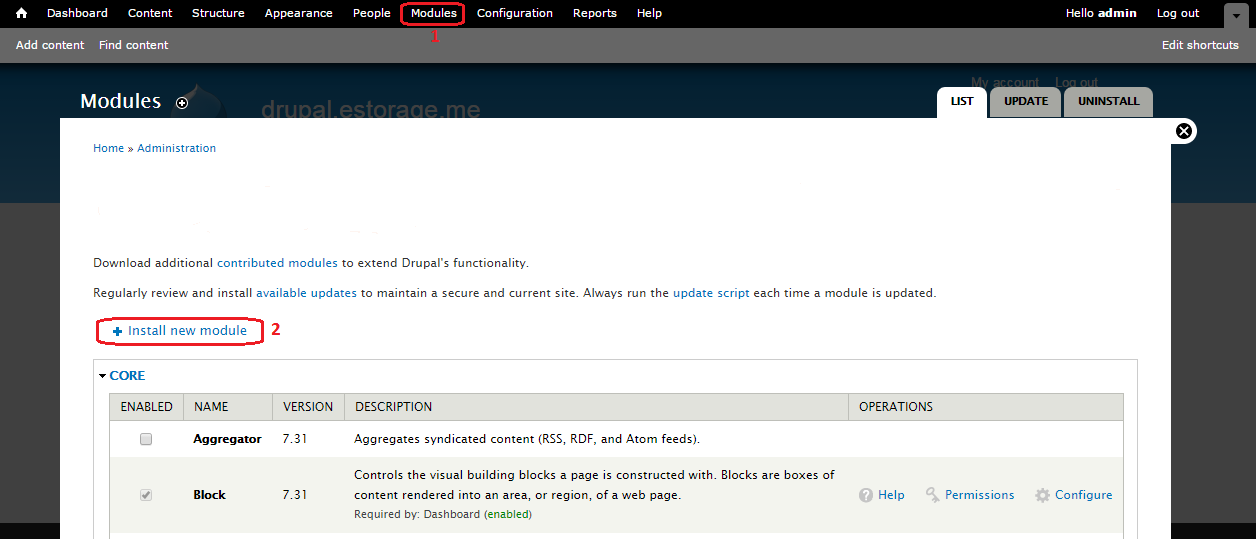
2. Install the Drupal CDN module.
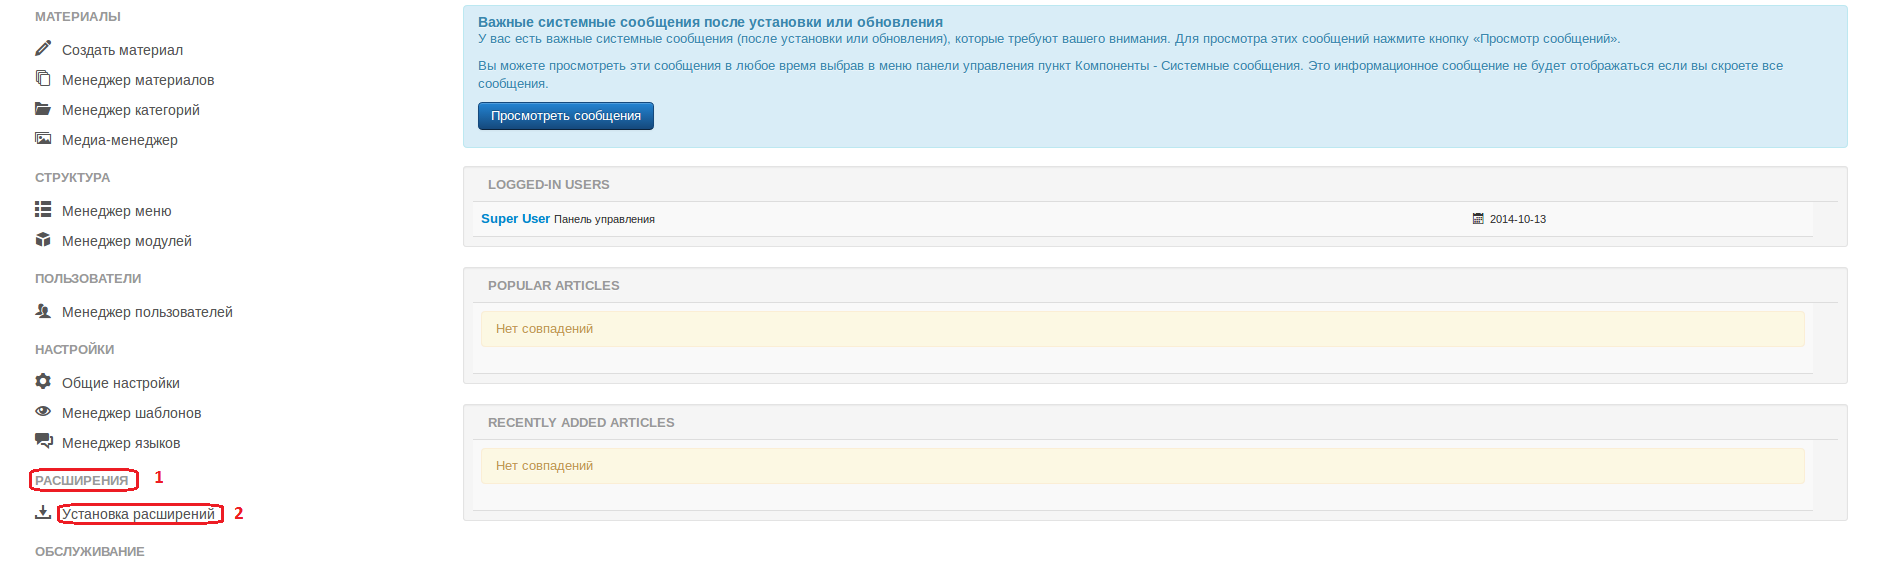
Login to Drupal, click on “Modules” (1), then “Install new module” (2)
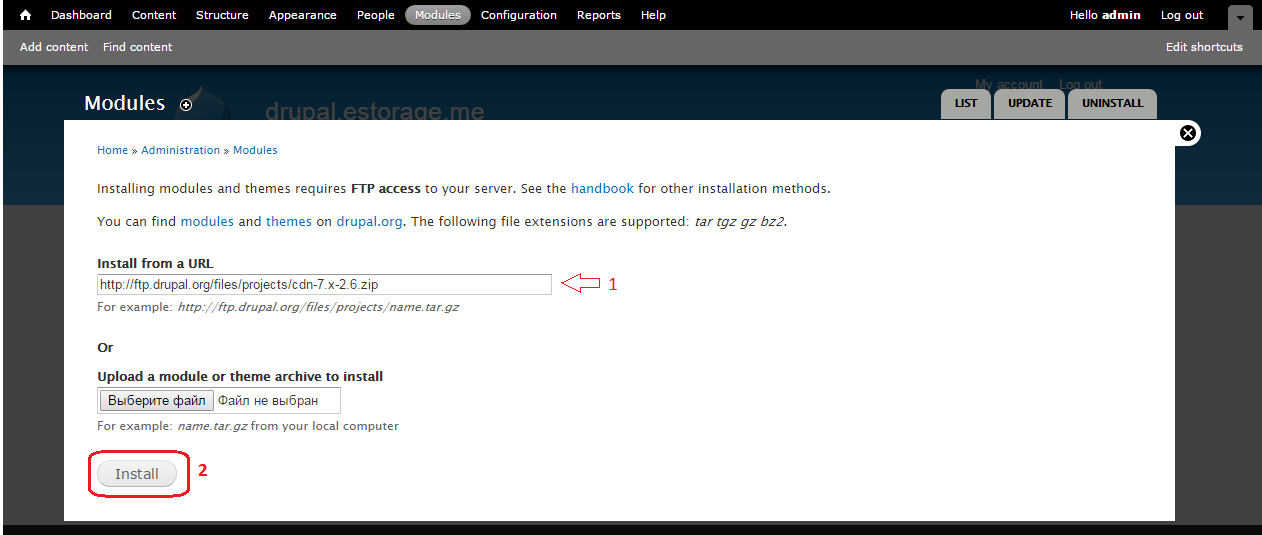
3 In “Install from a URL” field (1), enter url for CDN module //ftp.drupal.org/files/projects/cdn-7.x-2.6.zip and click“Install” (2)
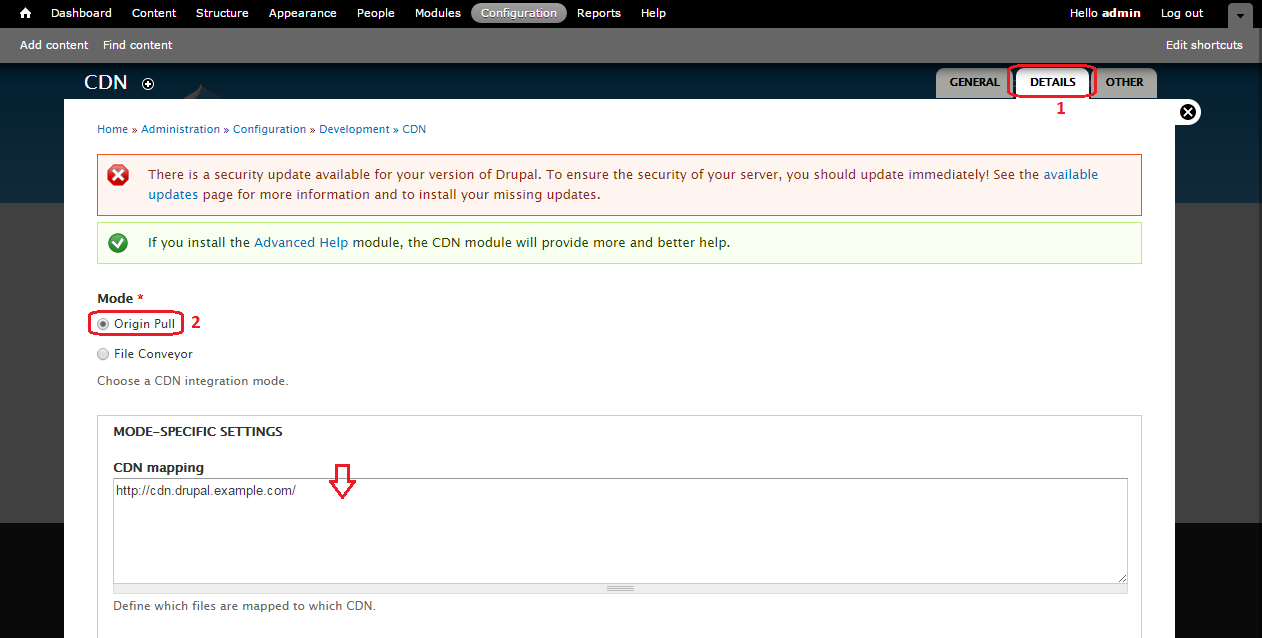
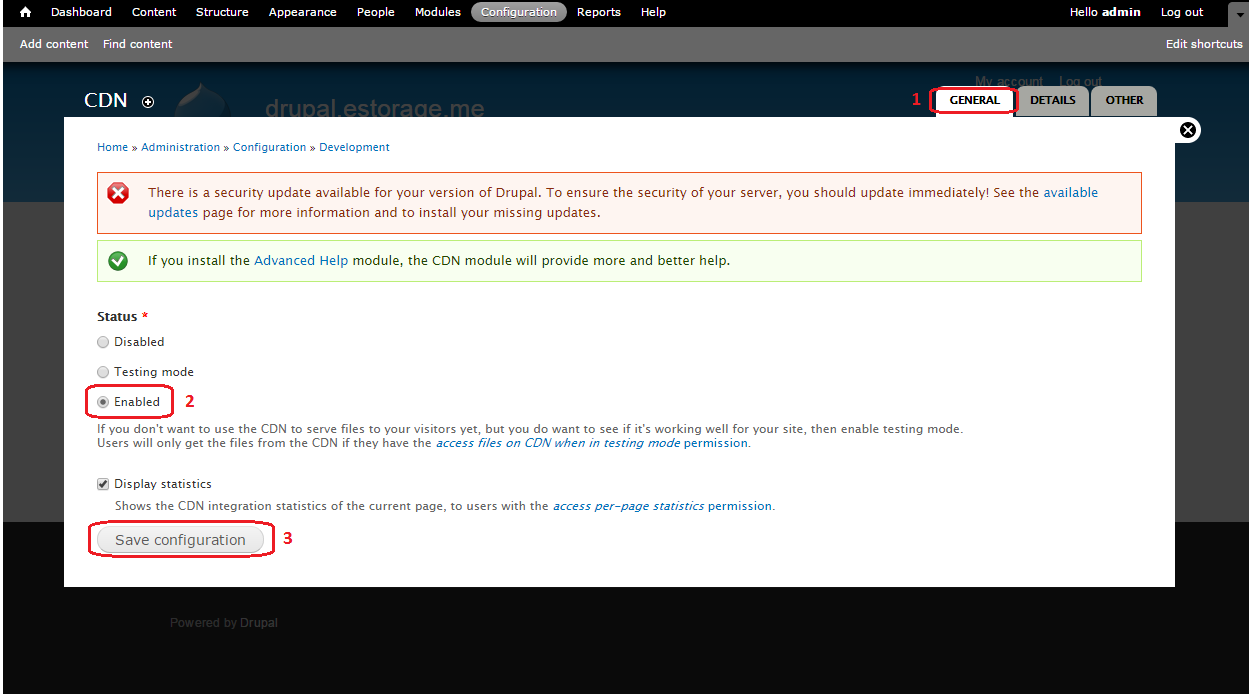
Click on “Configuration”(1) scroll down to “CDN”(2) and click on itue
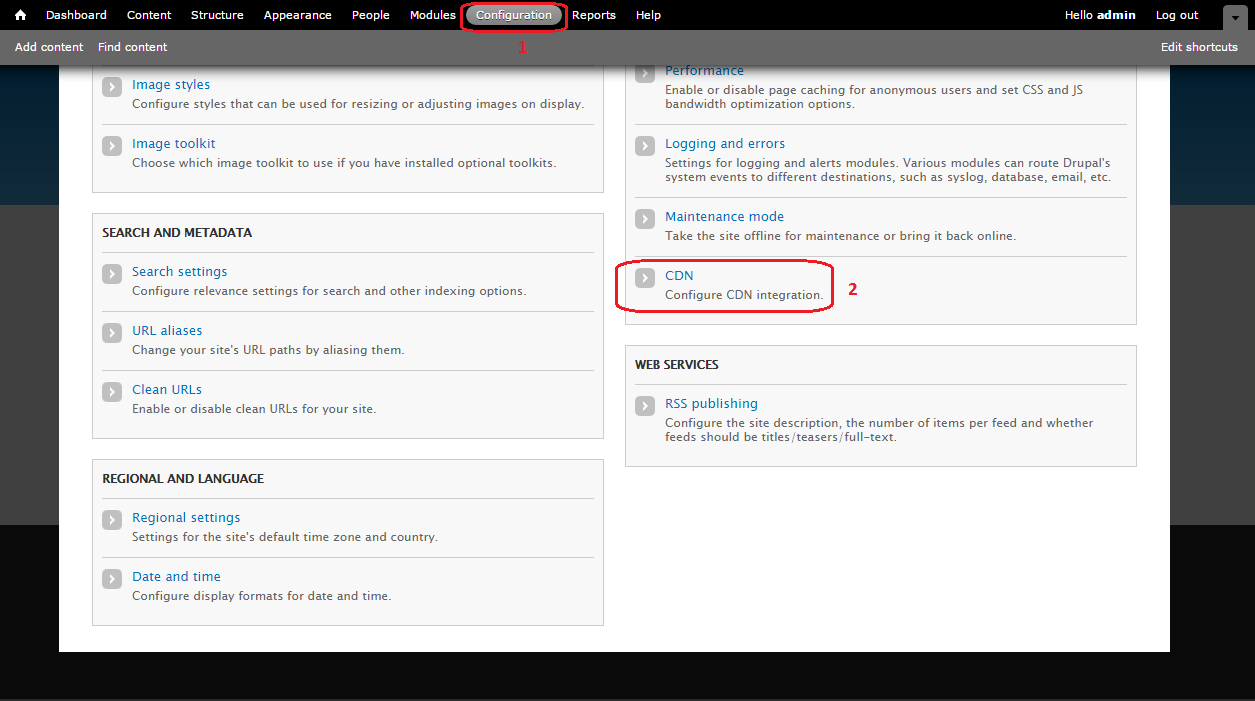
In “General” tab (1), choose “Enabled”(2) and “Save Configuration” (3).
3. In “Details” tab(1) choose “Origin Pull”(2). In “CDN Mapping” field enter Fetch name/CNAME in following format http://cdn.drupal.example.com/ and Save